
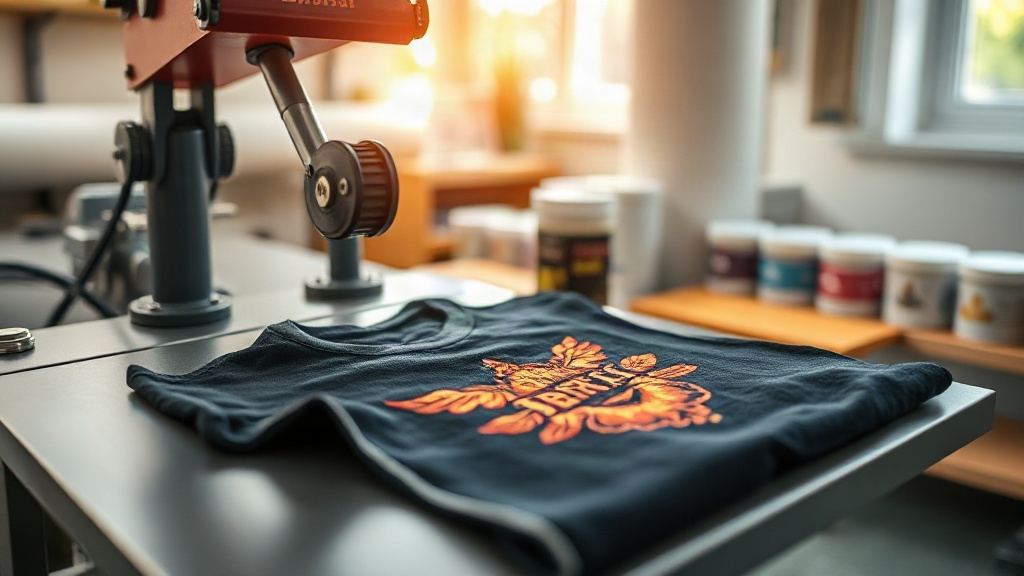
If you have spent any time around custom apparel, you have probably heard the term DTF Transfers tossed around. Maybe a friend showed off a shirt with a print so vivid it looked screen-printed, but the fabric was a stretchy polyester blend that normally rejects ink. That is the quiet magic of direct-to-film printing. Unlike older methods that demand specific fabric chemistry, DTF transfers bond to cotton, polyester, nylon, and just about anything in between. The result is a soft, stretchy, full-color print that survives the washing machine far better than most people expect.
This guide walks through what DTF transfers actually are, how they compare to the methods you may already know, and the practical details that separate a clean application from a peeling mess. Whether you run a small print shop or just want to decorate team jerseys at home, the same principles apply.
What Exactly Are DTF Transfers?
A DTF transfer is a printed design on a special film that gets adhered to fabric using heat and pressure. The process starts with a digital printer that lays down CMYK inks plus a white ink layer onto a PET film. The white layer is the secret sauce. Without it, colors would look washed out on dark shirts because fabric color would bleed through the ink. With it, you get opaque, saturated prints on black, navy, or any dark garment.
After printing, a thermoplastic powder is sprinkled over the wet ink and cured. That powder becomes the adhesive that grips the fabric during pressing. Once the transfer is ready, you place it on the garment, apply heat from a press, and peel away the film. What remains is a flexible print that moves with the fabric instead of cracking when stretched.
How It Differs From Screen Printing and DTG
Screen printing is fantastic for huge runs of the same design, but it costs money to set up each color. Direct-to-garment printing skips the setup but struggles on synthetic fabrics and often produces a faded look on darks. DTF Transfers sit in a useful middle ground. There is no minimum order, no color count penalty, and the prints work across fabric types. For small batches, one-off custom pieces, or designs with photographic detail, that flexibility is hard to beat.
Why the White Ink Layer Matters So Much
Beginners often wonder why their first attempts look dull. The answer is almost always the white layer. On a light shirt, you might get away with a thin white base. On a dark shirt, a weak white layer means the black fabric eats your colors alive. Good DTF film uses a generous, evenly cured white ink deposit. When you inspect a transfer before pressing, hold it against a light. If you can see through the design easily, the white layer is too thin for dark garments.
This is also why curing temperature matters. If the powder does not melt fully into the ink, the white layer can look patchy, and the final print may feel gritty. A properly cured transfer feels smooth and slightly tacky to the touch, not sandy.
Step-by-Step Application for Reliable Results
Applying a transfer is not complicated, but small mistakes cause most failures. Follow this sequence and you will avoid the usual headaches.
- Preheat the garment. Press for a few seconds to remove moisture. Trapped dampness turns into steam and ruins adhesion.
- Position the transfer. Place it print-side down on the fabric. If your film has a carrier side, make sure the ink faces the garment.
- Press with medium-heavy pressure. Temperature and time vary by film brand, but a common range is 300 to 320 degrees Fahrenheit for 10 to 15 seconds.
- Peel at the right moment. Some films are hot peel, some are cold peel. Check your supplier's instructions. Peeling too early or too late causes edge lifting.
- Post-press for durability. A second press of 5 to 10 seconds with a cover sheet smooths the print and locks the edges.
Common Mistakes to Avoid
- Pressing on a folded or wrinkled garment, which creates uneven pressure.
- Using too little pressure and blaming the film when edges lift.
- Skipping the preheat and trapping moisture under the print.
- Stretching the garment immediately after pressing while the adhesive is still cooling.
Choosing the Right Film and Powder
Not all DTF supplies behave the same. Cheaper films may curl during printing or leave residue on the press. Quality films hold their shape, release cleanly, and produce consistent white layers. The powder matters too. Fine powder gives a softer hand feel and works well for detailed designs, while coarser powder can be more forgiving for bold, heavy prints.
If you are just starting, buy a small roll of film and a sample of powder from a reputable supplier, then test on scrap fabric before committing to a big order. Testing costs almost nothing compared to ruining a batch of shirts.
Washing and Longevity: What to Expect
A well-applied DTF print handles normal wear well. Turn the garment inside out, wash in cold water, and avoid harsh bleach. Tumble dry on low or hang dry. Following those habits, most prints hold up for dozens of washes without fading or cracking. The weak points are usually the edges, which is why post-pressing matters. If you see lifting after the first wash, the issue is almost always pressure or peel timing, not the film itself.
When DTF Transfers Make the Most Sense
DTF shines when you need full-color detail without setup costs. Think small business merch, personalized gifts, sports team names with gradients, or sample runs before a big screen-print order. It also handles fabrics that other methods avoid, like nylon jackets or spandex blends. If your design has fine lines, photos, or lots of colors, DTF is often the simplest path to a professional look.
Frequently Asked Questions
Can I use DTF transfers on 100% cotton shirts?
Yes. Cotton is one of the easiest fabrics for DTF. The print bonds firmly and feels soft. Just preheat the shirt well because cotton holds moisture longer than synthetics.
How long do DTF transfers last after washing?
With cold washing and low-heat drying, most prints last through many wash cycles without noticeable fading. Edge lifting is the main risk, and proper pressing greatly reduces it.
Do I need a heat press, or can I use an iron?
A heat press gives even pressure and consistent temperature, which is why it is recommended. A household iron can work in a pinch, but results are less reliable and edges may lift sooner.
What temperature should I press DTF transfers at?
Most films call for 300 to 320 degrees Fahrenheit for 10 to 15 seconds. Always check your specific film's instructions, since formulations vary between manufacturers.
Are DTF transfers safe for children's clothing?
Once properly cured and pressed, the print is bonded to the fabric and behaves like any other garment decoration. Follow the supplier's safety guidance and wash before first wear.